Friday, April 30, 2010

Feel Good Friday - April Review


TGIF!
Get ready for May!

Wednesday, April 28, 2010

Easy Booster Seat Couture!


Today you will learn how to make your very own custom made booster seat cover. This project will involve an intro to pattern making too!

The booster seat I am using is the standard, bare bones "Costco" boosters that you see everywhere. I think mine were like $10- $15 at Big Lots, years ago and the price hasn't changed much. Odds are, if you have kids, you already have this exact model, or similar style.

IMG_1963

Ok, Here are your needed supplies:

A Booster Seat
Fabric (1/2 - yard; or clean blouses/ shirts from the Thrift Store)
Batting (1/2 yard)
pencil/chalk
scissors
1 package Double Fold Bias tape
thread

1. Flip your booster seat over and detach the seat pad from the base.

If your plastic base is filthy, like mine was, run it through the dishwasher. You can even pull the cup holder off and toss it in detached so that all the crevices get clean.
2. Lay your fabric out on a flat surface. You will need at least 4 layers, a decorative top fabric, a bottom fabric and 2 liner fabrics. Here I am using a shirt that I found at a thrift store. I bought it b/c I loved this print. So I pulled the blouse apart at the seams and had a large enough piece for this project! Yay! Under my top fabric I have 3 layers of muslin. One of these layers will be used to line the top fabric. One will line the bottom of our new cover and the third will be the bottom of our cover.

With your pencil or chalk, trace 1/2" away from the edge of the original cover. At the bottom of the cover, don't trace around each tab, rather, trace down the exterior edge of the side tabs only. Then draw a line across the bottom of the tabs, basically extending the bottom edge of the cover to the end of the tabs.

3. Remove the original cover and cut through all layers of fabric along your marked lines.

4. Stay Stitch through all layers along the sides and bottom of your new booster cover. Do not stay stitch the top edge.

5. On the WRONG side of your cover, lay the original cover down and mark the bottom edge of the cover between the tabs. Also at the top of the cover, mark the placement of the holes (used to secure the top of the cover to the plastic base.)

6. Cut a rectangle shaped piece from your excess top fabric. It should extend the width of your cover and be at least 2-3 inches in length. Place this piece, right sides together along the bottom 1/4 of your cover. This piece needs to be "centered" over the markings you just made which indicate the placements of the tabs.

Sew a large button hole the length of each of the tab markings and cut open the holes; or
Sew a rectangle between the markings. Cut open the hole and be sure the cut into the corners (but not through the stitches.)

Cut the excess fabric piece between the tab openings, so you can turn that fabric piece inside out. Press and stitch around the rectangle opening for a clean finished look.

7. Lay your cover on top of 2 layers of batting. Cut out along the edges of the cover. Then cut and remove about 1-2 inches from the top edge of the batting, 1/2 inch from the side edges, and trim off any batting that hangs longer than your rectangle openings.

8. Stuff batting into your cover through top opening (remember, we didn't stay stitch that end)

9. Fold the bottom flap up, wrong sides together, with the tab openings at the fold. Sew your double fold bias tape around the perimeter of the new cover, but NOT along the bottom edge, which is on a fold/ tab openings.

10. Sew 2 straight lines along the width of the 'stuffed' cover. Each stitch line should be at least 3"-4" apart. This will aid in keeping your batting in place while in use.


11. At top of the cover, where you've marked the holes from the original cover (see step 5) sew in tiny button holes. Cut open stitched button holes.

12. Slide your original cover's tabs through your new cover's tab openings.


Secure your new cover, which is covering the old cover, to the booster base with the original tabs and top holes (and your new top holes secured should connect to the base right over the originals.)


VIOLA! You are Done!

Monday, April 26, 2010

A Big Boy

My little man is about 3 1/2 years old. I really didn't want to have two kids in diapers so I kicked potty training into overdrive during my pregnancy. The little man knew when he had to go, he felt the urge, but he was afraid he would miss something if he left for a potty break. Through enough encouragement we managed to accomplish potty training and progress to big boy pants without using food (read CANDY) as a reward.

La la la… months of diaper free days and then Zena was born. By the end of that first week my little man was back to daily accidents. I was unfazed. I knew this might happen, after all, with a new baby in the house, he was bound to regress somewhat. At first I was gracious and understanding, then, with moderate sleep deprivation, working on establishing my milk supply, and being mommy 3 times over… well, let us just say, I became less gracious and understanding.

Enter in Cici, also known as - Grandma, my mother, and Darth. Cici filled a much needed role in my little man's life during these early weeks with his new baby sister. He spent more time with her then he did with me, and at times I began to catch glimpses of my "pre-Zena" big boy. It was Cici that helped him to re-establish his mastery over the potty. She potty trained me using M&Ms as a reward. It worked in then and now it worked with my son.

In general I try to not use food as a reward, or to sooth an emotional or physical hurt. I've tried to separate the idea of food = comfort. I want my kids to see food as food. I don't want them to use it as so many in our society tend to do, as a crutch. However, I was so relieved that the little man was back on track, that I didn't care about the how. My focus at the moment was on the result, which was positive. I don't mean to sound critical of my mother's methods. Most mothers use similar reward systems for potty training. I was and am grateful for her help and amazed at how much better a mother she is than anyone I know, including myself. I still have so much to learn.

So I carried on the M&M method of potty training after Cici had to go back to her home. I figured, that this instance of using candy as a reward probably wouldn't permanently affect my son's relationship with food. But part of me wondered… it was a small part, not a big enough part to sway from our new protocol, but still… with America's obesity epidemic and childhood diabetes on the rise, AND as a woman who struggles with her own body image and weight, I am a bit sensitive about establishing a healthy lifestyle and habits for my children. Had I just thrown it all away for an easy answer? I've spent weeks wondering, not agonizing, but actively considering this possibility every time my big boy announced he'd used his potty and was ready for his M&Ms.

We had a HUGE bag of M&Ms they lasted us for the whole time, until last week. Last week, I told my son, as I gave him the last of the candy that we were out of M&Ms. There would be no more M&Ms until I could get to the store. And do you know what he told me?

"That's okay Mama. Big Boys don't need M&Ms anymore," and handed the candy, about 8 M&Ms, back to me.

"Well, you can have these."

"No, I don't want them. Big Boys don't need them anymore."

"Really?"

"Uh-huh."

"Umm… okay then."

The next day, at the store, we walked by the M&Ms and I stopped and picked up a bag. I asked him again, if he really didn't want them anymore. He looked up at me and sweetly said, "No Mama. Big Boys don't need them now."

Cici, you are a genius. Thank you!

Cici holding Jack's hand

Wednesday, April 21, 2010

Fabric Button Earrings

I love covered buttons. They are fun and super easy to make. Plus, the finished product is, well, cute as a button.

Today we are going to make covered button earrings.
You won't need any special equipment.

The list of necessary items is pictured and listed below:

1 pair flat front post earrings
covered button blanks, size #24 (or 9/16")
wire cutters
scissors
fabric

1. Cut the button shank with your wire cutters. The shank should fall out of the button (the shanks are usually held in place via pressure.)

2. Thread your earring post through the opening on the button back. The post should be pointing upright through the back so that you can read the letters stamped into the button back.

3. On the back of your button package, you will find directions on how to make a covered button, including a circle template for cutting out your fabric.
Cut out your fabric using the provided template.

4. Center your button on the fabric circle and push the raw edges into the center of the underside to catch them under the teeth.

5. Place the earring/button back over the gathered fabric and push into the center until you hear a snap or a pop sound.

6. Ta-Da! Your one of a kind, hand made by you, earrings!

How super cute are these?
Enter the drawing to win these earrings by posting a comment this week on the blog or on the Jumping Monkeys Facebook page!

The winner will be announced on Monday!

Tuesday, April 20, 2010

Return to Roethlisberger


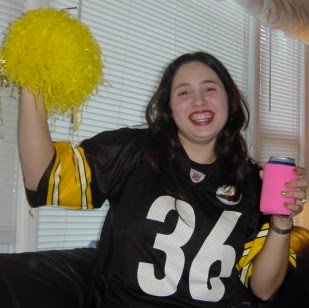
Allow me to state unequivocally that I am a Steelers fan. I bleed Black and Gold. I was born into a Steeler loving family with roots buried deep in the Appalachian earth of southwestern Pennsylvania. I've swung my Terrible Towel in good years and in bad. I am not a fair weather fan. I say all this because I am about to suggest something to the Steeler Nation that may seem a bit radical, but bear with me, and I hope you'll hear me out.

I have always been proud to cheer for the Steelers. I call them my boys. I've called them that even when they were all older than myself. And I call them that now, when most of the players are younger than my baby sister. You might hear about the wild escapades of players from other teams. You might shake your head as other players are sent to prison. Other athletes would get caught in compromising situations. But not my boys.

To don a Steelers uniform is an honour and a privilege. You aren't just playing football - you represent one of the oldest and most respected franchises in the history of the game. You represent the Rooney family, one of the great American families that has fought for the integrity of the sport (look up the Rooney Rule.) Most of all, you represent the people of Pittsburgh, Pennsylvania. My people.

Steeler players are legendary, best known for their actions on the field. To a true Steeler fan their names are sacred; Franco, Swann, Mean Joe, Bradshaw, Bettis, Ward, Polamalu… We wear their jerseys, not just on game day, on ANY day. And not just during football season - we wear that thing year 'round!

I wonder if Roethlisberger's off season idiocy will be better remembered than his time spent on the field.

Ben came on the scene when Tommy Maddox was injured during the third quarter of game 2 in the 2004 season. We lost that game, that was the first and last loss that Ben would experience for the rest of the season. Roethlisberger broke every record a rookie quarterback could break that season. If he'd never played another year, that first year alone was enough to secure him a spot in the hearts of every Steeler fan in the Steeler Nation for duration of all time. He came back in 2005 and delivered on a promise to bring home that fifth elusive Super Bowl Ring. And Ben didn't stop there. He gave his playoff paychecks to charities. He fought and scrambled and won us another Super Bowl.

Life outside the stadium has been iffy at best for Roethlisberger. Ok, so, he liked to ride motorcycles, without a helmet, or a license. He dodged more than one bullet in 2006 with a serious motorcycle crash and later an unrelated emergency appendectomy. But Big Ben weathered those storms, and when he was accused of sexual assault in the summer of 2009 it was easy to give him the benefit of the doubt. After all, he was our hero. He was already a legend. He was a Steeler. There was no way he'd do something that foolish…

So the Steeler Nation stood by him. Sure, he was reckless, but isn't that what we loved about him? Roethlisberger simply lived his life the same way he played football, he took risks, but he wasn't stupid…

Then, on March 5, 2010, a second accusation was voiced. Another sexual assault. A kid this time. 20 years old. And this time, there were witnesses, security cameras and blatant immoral behaviour. A star struck 20 year old girl and her friends bar hop, following Ben and his entourage. He can't control that, but he should be able to control himself. Ben's no longer a kid, he is a 28 year old man who has no business hanging around college town bars, let alone providing alcohol to minors. (Lucky for him this second alleged assault took place in Georgia, because if he'd been home in PA it's fairly likely that the charges would not have been dropped. The illegality of providing alcohol to minors is not good. But that's not the deal breaker here. In Pennsylvania if a man has sex with a woman, and she is drunk, or even slightly inebriated he can be brought up on charges of rape whether the sex is "consensual" or not. The law stating that a drunk woman can't properly give her consent.)

Even if one were willing to forgive the 'alcohol to minors,' and supposed consensual sex, it's the sordid details that really make the Steeler Nation sick to our stomache. I'm not going to repeat it here, you can watch the district attorney go into great detail from his press conference if you need that information.

Additionally, the Steeler Nation is enraged by this "Ben situation" because he has disrespected something that we hold dear. He's embarrassed the Rooney Family, our royal family. He's brought shame to a franchise that has stood for integrity and decency throughout the history of the NFL. And what is truly infuriating is that he's metaphorically spit in the faces of all the kids who have worn his jersey.

As a mother I cannot allow my 3 year old little boy to wear his beloved #7 Steeler jersey. I will not encourage him, even subconsciously, to look upon Ben Roethlisberger as a role model. Ben might be free and clear in the eyes of the law, but the Steeler Nation has had about enough his injudicious conduct.

Personally, I'd love to see him traded. He's a disgrace to the city of Pittsburgh and does not deserve the privilege of being a Steeler. Give him to Oakland. They can have him. Anyone can have him. No one player is greater than the team. I'd rather go back into the dark ages of the 90's than have Ben as our 'leader.' At least then I could hold my head up high when I walk by a poor fool wearing Cowboys attire.

I don't have the authority to deal with the "Ben Roethlisberger Situation," but I can still make a powerful statement against his asinine behaviour and so can you.

We have 3 of Ben's Steeler Jerseys. My husband and my children will never again wear his name and number. I don't ever want to look at those jerseys again, but I think I can stomach the sight of them one last time, when I package them up and deliver them to the US Postal Service so that they might return to Roethlisberger.

Imagine the statement such an action would impart.

I hope you'll mail your Roethlisberger jerseys back too.
Here is the address:

PITTSBURGH STEELERS
ATTN: BEN ROETHLISBERGER
3400 SOUTH WATER STREET
PITTSBURGH, PA 15203

Now, if you'll excuse me, I need to go shopping for some new Steelers jerseys...

Monday, April 19, 2010

Rough Week

It looks as though it may be a rough week with my little monkeys. My oldest missed 2 days of school last week with a cold. Her health has actually continued in a downward spiral over the weekend. It's not serious, just exhausting. Sunday morning my little monkey boy developed his big sister's cough. Joy. Rapture. And my littlest monkey has been fairly cranky, sleeping more than usual and demands constant contact.

My only symptom is exhaustion. Well, okay, I'm irritable too. Papa Monkey has avoided any illness, only because he's been working so hard at the hospital that he's had limited contact with the contaminated at home.

All in all this is shaping up to be an interesting week. I'm hoping that with enough liquids and rest we can beat this thing before the weekend. I'm not a fan of sick. Although, I am falling in love with Netflix all over again. That is the only upside of everyone being under the weather. The kids and I cuddle up in the covers of my king size bed and spend the day watching movies. I make mini meals and snacks, we'll pause for bathroom breaks, and occasionally get up for a little stretching. Other than that, we remain hunkered down until the dark cloud of ailment has passed.

When things finally get back to normal and we are all relatively healthy again, the energy in the house is palpable. You really do not want to be stuck inside all day, or watch the idiot box after such a forced hibernation.

So I will attempt to keep up with my beloved blog this week. I'll try to find time to make and post our weekly craft. But honestly, between Buffy the Vampire Slayer, Wizards of Waverly Place and Wall-E… let me just say, don't hold your breath waiting for updates this week. It's going to be an off one - for me and the monkeys at least.

Last week we painted nails. All of us. Here's a picture of our baby monkey's first pedicure. I'm sure we'll be doing more of the same. Maybe I'll throw in a couple of facials and mud masks. Who knows?!
At any rate - Be well and I hope your monkeys are jumping because for once, mine are not.

Wednesday, April 14, 2010

Custom Couture Paci-Clip

Here is a fun project to do at home. You don't even need a sewing machine!

Today we are making Custom Couture Pacifier Clips. This would make a great gift for the New Mom or baby in your life.

Here is what you'll need:

Letter Beads
Key Ring
Ribbon
Suspender Clip
Thread
Needle
Snaps or Velcro
1 - 1 1/2 inch Covered Button Kit
Fabric Scraps
For MAM pacifiers and ones with a button rather than a handle: O-Ring, size #17, 7/8" internal diameter - found in the plumbing section of your local hardware store.

Choose a phrase or wording for your Paci-Clip and thread the letters onto the key ring.
Then thread the ribbon through the key ring and suspender clip.

Fold over the ribbon end and sew it to the back of the ribbon.

Sew velcro or snaps to the opposite end of the ribbon.
For a "button" pacifier, add your rubber o-ring, and secure by closing snaps or velcro.

Attach Pacifier to end, either with the o-ring or by securing the velcro/ snap edge around the pacifier handle. (The O-ring will snap right on and remain secure!)

Create your covered button by following the directions on the back of its packaging.

Sew your covered button to the ribbon top, covering over your previous stitches.

TA-DA! How cute is that?
Enjoy!

Readers, I will be giving away this "Frog Dude" Paci-Clip plus a girly pink Paci-Clip to one of my blog readers! Simply comment either at this blog or at my Facebook page for your chance to win! The winners will be selected using a random number generator on Monday morning.