Showing posts with label crafts. Show all posts

Friday, March 4, 2011

Sew Sweet to Eat!!

Click here to visit the Bearfoot Baker's Photostream!
YUMMO!
I love to sew! I love to bake! 
BUT WHO DOESN'T LOVE TO EAT COOKIES!

Sometime in the future I might attempt making cookies as amazing as these…
but for now I'm content just looking

check out these spectacular 3-D Sewing Machine Cookies!

Baking might be easier for SOME… sewing is easier for ME!

Here is a fun FABRIC fortune cookie tutorial to try if flour is not your forte!
Click here for Lady Harvatine's Fortune Cookie Tutorial

OR

click the image below to buy these handmade felt beauties by Sew Cute Sweets at Etsy today!
Happy baking or sewing or shopping
and above all else…
Happy Friday!

Monday, October 11, 2010

Altered Art: Domino Pendants!


There is a new craft that has my Monkeys jumping! 

These are so easy to make you won't believe it! My mother found some awesome sites that showed us how to create these beautiful pendants.

These were all made by my almost 4 year old son!

If you love our pendants and want to make your own try the links below for 'how-to' guides.
OR

Check it out!


Friday, September 24, 2010

A Tale to Tell

My Halloween Mask placed 9th in Spoonflower's weekly design contest. I had such fun designing and making my masks that I attached a story to them. You can find the fabric version of The Lunar Moth and the Monarch Butterfly at Spoonflower by clicking here.

I'm also including 2 free printout masks for your very own use (see below)! Just click on the image to get the full size version, then right click and save! Should print on standard size paper.

And now for our story…


Once upon a time...
There were two lovers. Their love was pure and true. A scorned witch became jealous of their glory and cast a dark spell upon them.
One became a phantom of the night. With wings as enchanting as the moon.
The other was a slave to daylight, forever languishing in the sparkling sun.
The lovers only saw each other in the fleeting moments between wakefulness and dreams, as the sun and moon shared dominion over the sky.
The witch, no longer jealous, saw the anguish of their fate and wept.
The spell had brought only more pain to an already scorched heart. In despair the witch became the softest breeze. An eternal penence to caress and soothe the pain that was wrought.

Thus is the tale of the Lunar Moth and the Monarch Butterfly.


Friday, September 10, 2010

Favourite Blogs

Last weekend I was at a friend's wedding and was able to PAR-TAY with some good friends from college. The topic of conversation made its way to blogs and I promised to post some of my favourite blogs that I've found and read.

1) How About Orange - I check this blog about every other day, which is great, b/c that's about as often as Jessica Jones, graphic & textile designer extraordinaire, publishes a new post. She has all sorts of links and tid-bits about crafts and design.


2) This Mama Makes Stuff - This blog I check in with about once a week. It is well stocked with crafts and altered art (and clothing!) Carrie Lundell publishes this blog and, honestly, I don't know when the woman sleeps. She is a runner, biker, great mom and is CONTINUALLY crafting and blogging. When I grow up I want to be Carrie.


3) Things Your Grandmother Knew - I have to be careful about reading THIS blog. I tend to get sucked in, and read until my eyeballs ache. I don't know who manages this blog, but they are right up my ally when it comes to retro living and vintage chic.


These are, or course, not the ONLY blogs I read. I'll post more each week!
Enjoy for now!
Cheers!

Monday, August 2, 2010

Tea Time for the Birds!

This week's theme is Tea Time!

I found this bird feeder tutorial at Cap Creations. I slightly altered the materials used. Copper pipe is EXPENSIVE! And copper probably looks better, but for my birdy tea party we used 1" PVC pipe end caps and 3/4" black steal pipes. Much less expensive, especially if you are making several, and we are all crafty types here, so making 1 just will not do!

The kids and I all picked out our own tea cups at our favourite thrift store and then hit our local hardware store for the pipe, end cap (both found in the plumbing section) and super all-weather glue. We glued the cups to the saucers, carefully following the directions on the glue, and once that was dry the end caps were glued to the bottom of the saucer.


Water goes in the cup, and bird seed goes on the saucer! Viola!


Sunday, July 18, 2010

Breaking the Silence

I haven't posted in looong time, but hey, it is summer and that means schools out, the kids are hyped up and life gets VERY busy.

It's funny, because I look forward to summer so that I don't have to get up so early to get kiddies up and out the door to school. But the kids get up early anyway!

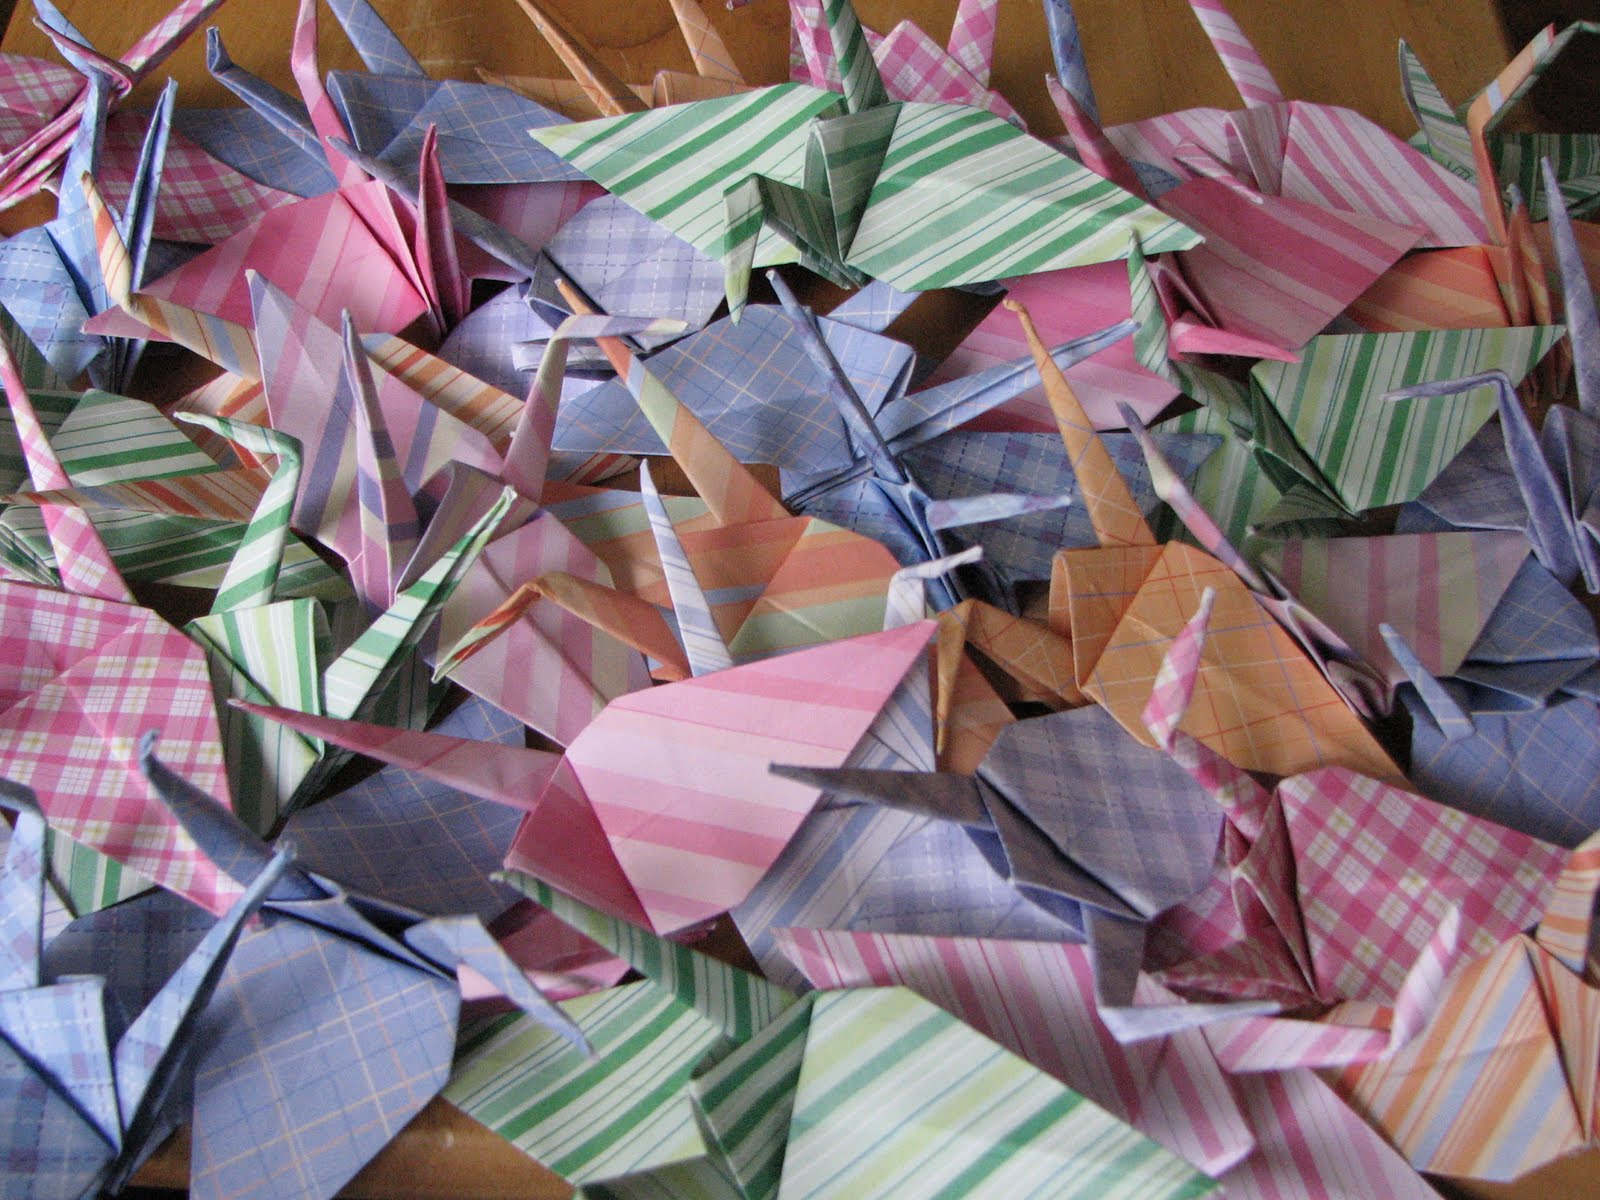
One of our latest projects has been paper crane folding. Did you know that 1,000 paper cranes are called Senbazuru?  According to ancient Japanese legend when someone folds 1,000 paper cranes they are granted a wish from a crane. The crane is believed to be a mystical creature full of magic. Senbazuru are considered extremely lucky and are often given as gifts for special occasions.

Here is the link that I used to learn how to fold an origami crane: http://www.wikihow.com/Fold-a-Paper-Crane

And an image of some our pretty pastel cranes…

Monday, July 5, 2010

Cheater Quilts at Spoonflower


This week's fabric contest at Spoonflower is the cheater quilt! A cheater quilt is a printed image on a single piece of fabric that looks like a pieced quilt once it is stitched around the pattern.

I have always wanted to make a double wedding ring quilt but have been too intimidated by the all the curves and small pieces, so I've made the next best thing. My very own 1930's inspired double wedding ring cheater quilt! All the fabric designs used in the quilt are my own interpretation of classic 1930's patterns and colours.

Some highly impressive designs have been submitted for the contest. I encourage everyone to go to Spoonflower and vote for their favourites! The winning designer will receive $100 to be spent at Spoonflower.com!

Thursday, June 10, 2010

LAST DAY OF SCHOOL!

Today my little girl becomes a rising 3rd grader! Last night we had girl night, since Daddy was on call and the Little Man was at Grandma's house. We camped out in my bed, listened to the first few chapters of the audiobook reading for Twilight and talked ourselves to sleep.

Today she had her favourite breakfast and we got her teacher's end of year gift put together. Her teacher is having a baby girl any day now, so I made a custom solarveil sling (will have to do a tutorial for yall), included some SEA stationary, a "How To" on homemade baby wipes and sling wearing instructions. All in a bright pink metal pail for summer! And wouldn't you know it - I forgot to take a picture!

Now I'm getting ready for our summer vacation celebration this afternoon! First on my list are bright and beautiful hand tied floral bouquets! Here is the video from a great site called Howdini. I am officially addicted!


And here is the bouquet I made for my Rising Third Grader!

Tuesday, May 25, 2010

Free Retro Shoes Bookplate

Today I am offering my first free printable design!

Click on the image below and either right click to download the bookplates or just print directly from your internet browser.
Print on standard white paper and glue into books using a glue stick, or print on sticky back label paper
**Designed for AVERY #8164**

Viola! Instant cuteness!

This design complements the shoe fabric I've designed and listed on spoonflower.com!

Enjoy!

Monday, May 24, 2010

Artist in Residence


Last week a note was sent home from my daughter's school. Charlotte is NEVER in trouble, so I wasn't concerned when she handed it to me, in fact, she was highly excited.

As it turns out, Charlotte's Kabuki Theatre Mask was chosen to represent her class in a county wide art exhibition. I could not be more proud!

Below in an interview with the artist. 


And a shout out to her awesome Art Teachers!


Wednesday, May 12, 2010

My Latest Obsession


I don't have a craft today. I know, I know. It's crafty Wednesday, but we will have to play crafts later. I have something to show and tell you about that has me more excited about creativity than anything has in a long while!

Creative Types had better brace themselves.

I found a site called Spoonflower. Spoonflower is a fabric printing shop. A real fabric printing shop. I'm talking yards and bolts and fat quarters, oh my! The price of the fabric is not cheap, but it's less expensive than designer fabric (read: Lily Pulitzer) and the cool thing is that it IS designer fabric - YOUR DESIGNS!

You can sign up for a free account and start uploading your images. You can have fabric of a drawing, painting, photographs, graphic design… anything! Imagine an apron made with your child's drawings! Imagine that painting of a sunflower that would make the cutest pattern on a dress! Don't even get me started on Christmas gift possibilities!

Your image must be 150 dpi (dots per inch) whether your scanning or creating digitally and all uploads must be less than 30 MB. Prices start at $5 for an 8 x 8 swatch, so if you want some unique one of a kind quilt squares, just upload an 8 x 8 image at 150 dpi and, Ta-da! (sigh) It's so exciting!

And others can order your fabric too, and you will get a 10% designer comission. Your designs always remain your personal property and you may remove your "fabric" from the site at anytime and they will not reprint it unless you re-post the image.

I already have 5 fabrics posted and am eagerly awaiting their arrival in the mail! (eek!)

Here's what has kept me from my regular crafting - plus, it is easier for me to create digital graphics while nursing my baby than attempt other creative endeavors. Each week they have a contest for $100 store credit, and YOU KNOW I've been working on entries since I found this site!

This week's theme is puppet patterns. The deadline was Tuesday so you can't enter it, but you can vote! (this past week's contest , some very cool cocktail fabrics, may still be accepting votes but the puppet patterns should be up soon!)

Here's my entry for this week's contest!


Grab a vine and swing by www.spoonflower.com to learn more and to vote!

Wednesday, April 28, 2010

Easy Booster Seat Couture!


Today you will learn how to make your very own custom made booster seat cover. This project will involve an intro to pattern making too!

The booster seat I am using is the standard, bare bones "Costco" boosters that you see everywhere. I think mine were like $10- $15 at Big Lots, years ago and the price hasn't changed much. Odds are, if you have kids, you already have this exact model, or similar style.

IMG_1963

Ok, Here are your needed supplies:

A Booster Seat
Fabric (1/2 - yard; or clean blouses/ shirts from the Thrift Store)
Batting (1/2 yard)
pencil/chalk
scissors
1 package Double Fold Bias tape
thread

1. Flip your booster seat over and detach the seat pad from the base.

If your plastic base is filthy, like mine was, run it through the dishwasher. You can even pull the cup holder off and toss it in detached so that all the crevices get clean.
2. Lay your fabric out on a flat surface. You will need at least 4 layers, a decorative top fabric, a bottom fabric and 2 liner fabrics. Here I am using a shirt that I found at a thrift store. I bought it b/c I loved this print. So I pulled the blouse apart at the seams and had a large enough piece for this project! Yay! Under my top fabric I have 3 layers of muslin. One of these layers will be used to line the top fabric. One will line the bottom of our new cover and the third will be the bottom of our cover.

With your pencil or chalk, trace 1/2" away from the edge of the original cover. At the bottom of the cover, don't trace around each tab, rather, trace down the exterior edge of the side tabs only. Then draw a line across the bottom of the tabs, basically extending the bottom edge of the cover to the end of the tabs.

3. Remove the original cover and cut through all layers of fabric along your marked lines.

4. Stay Stitch through all layers along the sides and bottom of your new booster cover. Do not stay stitch the top edge.

5. On the WRONG side of your cover, lay the original cover down and mark the bottom edge of the cover between the tabs. Also at the top of the cover, mark the placement of the holes (used to secure the top of the cover to the plastic base.)

6. Cut a rectangle shaped piece from your excess top fabric. It should extend the width of your cover and be at least 2-3 inches in length. Place this piece, right sides together along the bottom 1/4 of your cover. This piece needs to be "centered" over the markings you just made which indicate the placements of the tabs.

Sew a large button hole the length of each of the tab markings and cut open the holes; or
Sew a rectangle between the markings. Cut open the hole and be sure the cut into the corners (but not through the stitches.)

Cut the excess fabric piece between the tab openings, so you can turn that fabric piece inside out. Press and stitch around the rectangle opening for a clean finished look.

7. Lay your cover on top of 2 layers of batting. Cut out along the edges of the cover. Then cut and remove about 1-2 inches from the top edge of the batting, 1/2 inch from the side edges, and trim off any batting that hangs longer than your rectangle openings.

8. Stuff batting into your cover through top opening (remember, we didn't stay stitch that end)

9. Fold the bottom flap up, wrong sides together, with the tab openings at the fold. Sew your double fold bias tape around the perimeter of the new cover, but NOT along the bottom edge, which is on a fold/ tab openings.

10. Sew 2 straight lines along the width of the 'stuffed' cover. Each stitch line should be at least 3"-4" apart. This will aid in keeping your batting in place while in use.


11. At top of the cover, where you've marked the holes from the original cover (see step 5) sew in tiny button holes. Cut open stitched button holes.

12. Slide your original cover's tabs through your new cover's tab openings.


Secure your new cover, which is covering the old cover, to the booster base with the original tabs and top holes (and your new top holes secured should connect to the base right over the originals.)


VIOLA! You are Done!

Wednesday, April 21, 2010

Fabric Button Earrings

I love covered buttons. They are fun and super easy to make. Plus, the finished product is, well, cute as a button.

Today we are going to make covered button earrings.
You won't need any special equipment.

The list of necessary items is pictured and listed below:

1 pair flat front post earrings
covered button blanks, size #24 (or 9/16")
wire cutters
scissors
fabric

1. Cut the button shank with your wire cutters. The shank should fall out of the button (the shanks are usually held in place via pressure.)

2. Thread your earring post through the opening on the button back. The post should be pointing upright through the back so that you can read the letters stamped into the button back.

3. On the back of your button package, you will find directions on how to make a covered button, including a circle template for cutting out your fabric.
Cut out your fabric using the provided template.

4. Center your button on the fabric circle and push the raw edges into the center of the underside to catch them under the teeth.

5. Place the earring/button back over the gathered fabric and push into the center until you hear a snap or a pop sound.

6. Ta-Da! Your one of a kind, hand made by you, earrings!

How super cute are these?
Enter the drawing to win these earrings by posting a comment this week on the blog or on the Jumping Monkeys Facebook page!

The winner will be announced on Monday!